2026-09-05
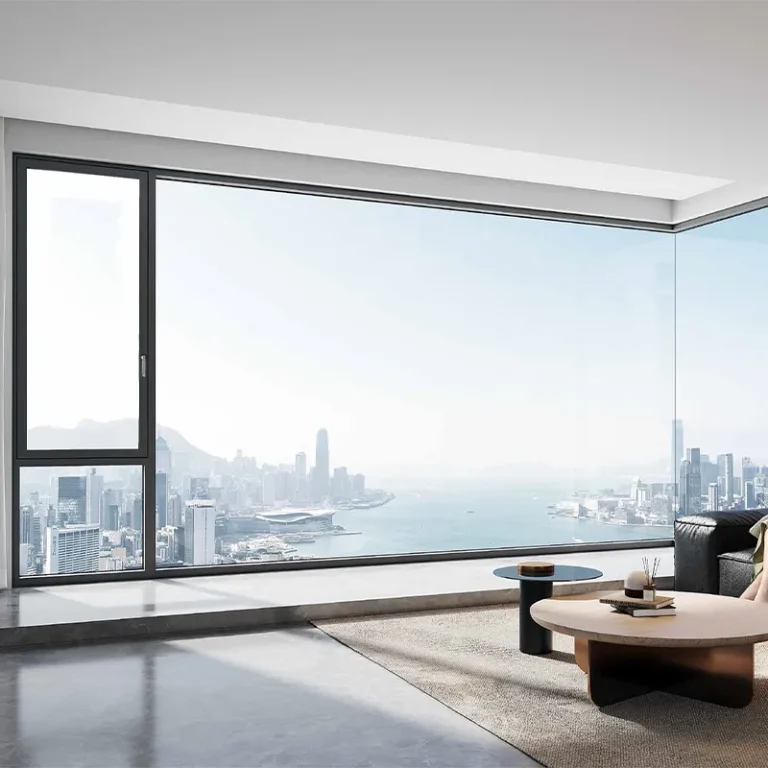
Direct answer: A casement picture window combines a broad fixed lite with one or more hinged casement lites when the design needs a clear view plus controlled ventilation. Decide the fixed-to-operable ratio from sightlines, egress, furniture, mullions, glass performance, and the actual opening path—not from elevation symmetry alone.
Choose the Fixed-and-Operable Mix
The term casement picture window is often used for several arrangements: a fixed center picture lite with operating flankers, a fixed lite above a casement, or a multi-lite assembly where only one sash opens. Start by writing the user problem. A living room may need an uninterrupted view and occasional purge ventilation; a bedroom may need a compliant emergency escape opening; a stair landing may need daylight without a sash that collides with traffic.
Forge Windows’ bay-window flanker layout guide shows why each flanker needs its own mark and swing. The same discipline applies to a flat picture-window composition. Do not count a fixed lite as ventilation or egress. Do not assume that a wide picture opening can be made operable later without changing mullions, hardware reach, structural support, and glass selection.
| Need | Useful arrangement | Check before approval |
|---|---|---|
| View first | Wide fixed center lite with narrow casement flankers | Vertical sightline, mullion width, exterior cleaning access |
| Cross-ventilation | Two operable casements on opposite sides | Air path, sash collision, screens, operator reach |
| Emergency escape | Operable unit sized for the required clear opening | Local code, hardware release, well or guard conditions |
| Daylight only | All-fixed picture assembly | Cleaning, fall protection, glass safety and future access |

Draw the Opening Layout Before Ordering
Give the assembly a stable opening mark, then add suffixes for fixed and operating lites. For example, W-204-F can identify the picture lite while W-204-L and W-204-R identify the left and right casements. Record the viewing convention for handing—interior looking out or exterior looking in—and keep that convention on elevations, schedules, shop drawings, and the order.
- Set the datum: note finished floor, head, sill, centerline, and adjacent wall or cabinet references.
- Locate mullions: show sightline, reinforcement, drainage paths, and any required expansion or splice.
- Draw the swing: arc the sash on the room and exterior elevations; include operator handle, screen, shade, and curtain zones.
- Test access: place furniture, counters, guards, and cleaning paths at scale. A beautiful swing that cannot be reached is not a usable design.
- Record exceptions: identify which lite is fixed, which opens, and what happens if a size or handing changes.
For a grouped assembly, do not let a single overall width hide different frame sizes or rough-opening conditions. The casement size-chart guide explains why call size, frame size, rough opening, daylight glass, vent, and clear opening must be labeled separately. Ask the selected manufacturer to confirm conversion rules and tolerances for each mark.
Verify Glass, Safety, and Performance
A fixed picture lite and an operable casement may have different glass area, frame geometry, and performance values. Use the exact product configuration and current label, not a value copied from a neighboring size. The National Fenestration Rating Council explains that whole-product ratings belong to a certified product and configuration. The ENERGY STAR window and door guidance helps teams select products for the applicable climate zone.
Check safety glazing where impact or hazardous locations require it, and confirm whether a fixed lite needs a visible safety mark. For an egress room, calculate the clear opening of the operable sash with hardware and stops installed; the picture lite contributes daylight but not release. Screens, limit devices, guards, and insect-control accessories can reduce usable opening or change the release sequence.
Thermal and water details also cross the mullion. Confirm frame material, thermal breaks, spacer, glazing bite, drainage, weeps, and sealant joints. Ask for structural and water-performance limits for the actual lite dimensions and exposure. If one flanker is larger or more exposed, it may govern the system even when the elevation looks balanced.

Coordinate Wall and Interior Interfaces
Before release, show how the complete assembly meets the wall. Identify retained framing, sill pan or drainage concept, flashing transitions, sealant-joint geometry, insulation, interior returns, exterior trim, and finish restoration. A fixed center lite can have a different sill or drainage path from an operating flanker; the interface detail must keep water moving out.
Coordinate window treatments and furnishings with the sash arc. A handle behind a deep counter may be technically present but practically unusable. A screen pocket may conflict with a trim return. An exterior awning, guard, or adjacent bay may block a sash. Record those constraints in the schedule instead of relying on a field installer to improvise.
When older paint or coatings are disturbed, consult the U.S. EPA renovation, repair and painting guidance and applicable state requirements. This article does not replace a qualified safety plan or project-specific code review.
Use a Five-Point Approval Gate
Hold one coordinated review with the owner, designer, supplier, and installer. Release the casement picture window only when every answer below is documented:
- Do opening marks, fixed/operable designations, dimensions, and handing match on every drawing and quote?
- Can each sash open, lock, screen, and clean without collision or inaccessible reach?
- Are clear-opening, safety-glazing, thermal, air, water, and structural requirements tied to the exact configuration?
- Are mullions, drainage, flashing, sealants, trim, and finishes shown at the wall interface?
- Are samples, exceptions, revision date, approver, and delivery checks recorded?
At delivery, compare labels to the opening schedule before moving units into rooms. Quarantine a wrong-handed flanker or swapped fixed lite; do not quietly exchange marks in the field. Keep photographs and labels through installation and closeout.
Frequently Asked Questions
What is a casement picture window?
It is a composition that combines a fixed picture lite with one or more hinged casement lites so a project can gain a broad view while retaining controlled ventilation or release where needed.
Does the fixed picture lite provide ventilation?
No. Ventilation comes only from the operable casement lites, and their opening area, screens, controls, and clearances must be checked separately.
Can a casement picture window meet egress needs?
Only an operable lite that meets the applicable clear-opening and release requirements can contribute to egress. Confirm the adopted code and the installed hardware with the project professional.
How should the fixed and operating parts be scheduled?
Use one assembly mark with explicit fixed and operable suffixes, separate size and handing fields, a viewing convention, and a drawing revision that matches the order and delivery labels.
Conclusion: Design the View and the Motion Together
A successful casement picture window is more than a symmetrical elevation. Separate fixed and operable duties, draw the real swing, verify the exact glass and ratings, coordinate the wall interface, and release only a traceable schedule. That process protects the view while ensuring the lites that must open can actually do so.