2026-09-05
Direct answer: Casement window latch hardware must be matched as a set: handle or lock body, spindle or linkage, keeper, mounting pattern, handing, seal compression, and any restrictor or inside-release requirement. A replacement that merely looks similar can fail to engage, leave the sash loose, damage seals, or block an emergency opening.
Treat Casement Window Latch Hardware as a System
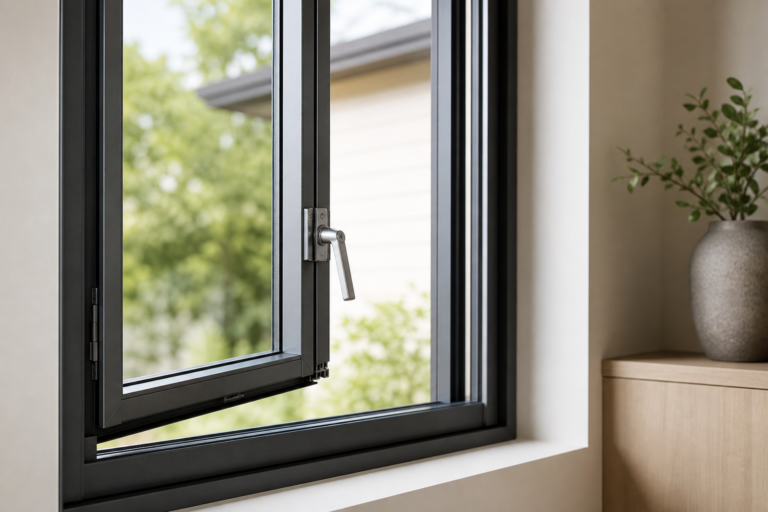
A casement latch closes the sash against the frame; it does not work independently of the keeper, linkage, seals, hinges, operator, and frame. Some units use a single cam latch, while others use a multipoint lock connected by rods. A handle may turn a spindle, slide a hook, or drive a gearbox. Identify the mechanism before selecting a replacement.
Forge Windows’ latch alignment and seal guide focuses on engagement and contact, while the lock replacement matching guide covers identity, handing, mounting, keeper geometry, linkage, and safety. This article concentrates on the latch-hardware set and its verification, not on repeating those workflows.
| Part | Question | Failure sign |
|---|---|---|
| Latch or lock body | What motion engages it? | Handle turns without capture |
| Keeper or strike | Where does the hook or cam land? | Partial engagement or scraping |
| Spindle/linkage | How is motion transferred? | Excessive play or uneven lock points |
| Seal | How much compression is intended? | Air leak, water path, or crushed gasket |
| Limiter/release | Can the unit open as required? | Blocked cleaning or emergency operation |

Survey the Existing Latch Set
Photograph the closed unit, latch face, keeper, handle, hinge side, operator, and any label. Record opening mark, viewing convention, material, finish, sash size, latch count, keeper shape, screw spacing, backset, spindle or linkage size, and the distance from the sash edge. Measure with the sash fully seated, not while it is twisted or held open.
- Close the sash gently and mark the latch and keeper centerlines.
- Measure the closed gap at latch height and compare it with the head and sill gaps.
- Operate the handle slowly; note when the cam, hook, or rod begins to engage.
- Inspect screws, threads, keeper slots, and frame material for wear or pulled holes.
- Check whether a screen, curtain, trim, or counter limits access to the handle.
Do not assume a common brand or a visually matching finish proves compatibility. Keep the original hardware until the replacement is installed and accepted. If the frame is cracked, the sash is unstable, or the latch cannot release normally, stop and use a qualified professional.
Match Geometry, Handing, and Security
Handing determines where the latch and keeper sit and how the handle is reached. State whether left and right are viewed from inside or outside, then show the relationship on the elevation. Check keeper height, projection, hook or cam shape, strike depth, screw spacing, and the amount of adjustment available. A few millimeters can determine whether the latch captures or rides over the keeper.
Match the latch to the operator and hinge alignment. A sash that has dropped may make a good latch appear faulty. Conversely, a replacement keeper can force a misaligned sash against the seal and overload the operator. The supplier should confirm the complete set and any permitted shim or adjustment method in writing.
Security is a functional requirement, not a finish description. Confirm that all intended lock points engage, that the keeper is anchored to sound material, and that the handle cannot be turned through a false or partial position. The U.S. Consumer Product Safety Commission window-safety information is useful context for keeping opening controls and guards from creating new hazards; project professionals determine the applicable solution.

Verify Seal Compression and Interfaces
When the latch engages, it should pull the sash evenly against the intended weather seals. Too little compression can permit air or water movement; too much can make the handle hard to operate, crush the gasket, or distort the sash. Inspect the gasket for cuts, hardening, paint, debris, and gaps, then compare contact around the perimeter.
Coordinate the latch with frame, glazing, hinge, and installation interfaces. A replacement window may have a different frame offset or reveal. A new interior trim layer can block the handle. A screen or opening limiter can interfere with release. Record these conditions in the opening schedule and ask the manufacturer to confirm the acceptable stack-up.
For energy performance, use the exact product’s current documentation rather than promising a rating from hardware alone. The NFRC resources explain product-specific certification, and ENERGY STAR guidance addresses appropriate residential window selections. Hardware supports the assembly’s function; it does not create a laboratory rating by itself.
Test, Record, and Close Out
After installation or adjustment, test from the normal room side. Open the sash through its intended range, close it without force, engage every latch or lock point, and confirm even seal contact. Operate the handle repeatedly, check the screen and limiter, and verify any inside release needed for the room’s use. Do not claim that a hand test proves a certified air or water rating.
- Capture an open-position photo showing hinge side, operator, and clearance.
- Capture a closed-position photo showing latch and keeper engagement.
- Check handle force and note any binding or scraping.
- Inspect seal contact and visible frame movement.
- Record part numbers, installer, date, remaining limitations, and owner acceptance.
If a latch still fails, return to alignment, hinge, operator, and frame conditions before changing more parts. Keep a superseded part and dated revision in the closeout file so later service does not repeat the same diagnosis.
Frequently Asked Questions
What belongs in casement window latch hardware?
The latch or lock body, handle, spindle or linkage, keeper, fasteners, any rods or guides, and the associated seal and adjustment details belong in the matching record.
Can I replace only the keeper?
Only if the manufacturer confirms geometry, handing, projection, fasteners, and latch compatibility. A keeper alone cannot correct a dropped sash, damaged latch, or weak frame.
How much handle force is normal?
Use the manufacturer’s service guidance. Excessive force is a diagnostic signal for misalignment, over-compression, debris, damaged seals, or an incompatible part—not a target for adjustment.
Can latch hardware affect egress?
Yes. A lock, limiter, screen, or release device can delay or reduce the usable opening, so verify inside release and clear opening against the project’s applicable requirements.
Conclusion: Match the Contact, Not Just the Color
Casement window latch hardware succeeds when the latch, keeper, handing, seal, operator, and frame work as one verified set. Survey the geometry, match the complete mechanism, confirm seal compression and release, and document the closeout test. That record protects normal operation and makes future replacement far less speculative.