2026-09-05
Direct answer: Inspect casement window hinges by confirming the hinge side, track or shoe, fasteners, sash alignment, clearances, corrosion, and adjustment range before ordering parts. A hinge that feels stiff may be dirty or misaligned, but a bent track, stripped fastener, overloaded sash, or failed frame connection can require a matched replacement system.
Identify the Casement Window Hinge System
Casement window hinges may use a track with sliding shoes, separate butt hinges, or a concealed friction-stay assembly. The visible arm is only one part of the load path. Record manufacturer or series marks, sash size, hinge side, operator location, track length, shoe shape, fastener pattern, and any stamped part number. A replacement that looks similar can have a different stack height, screw spacing, or opening limit.
Use the opening mark from the project schedule and state the viewing convention. Forge Windows’ operator identification guide explains how operator arm geometry and hinge movement interact. The parts symptom guide helps separate hinge, operator, latch, seal, and frame symptoms before a purchase is made.
| Observation | Possible source | Evidence to collect |
|---|---|---|
| Sash drops at the lock side | Hinge wear, loose fasteners, or frame movement | Gap measurements, hinge photos, fastener condition |
| Handle binds near closed | Misalignment, keeper pressure, or track damage | Motion video, seal contact, lock position |
| Metal flakes or rust | Corrosion or coating failure | Close-up, exposure, drainage and cleaning history |
| Sash opens unevenly | Bent track, shoe release, or overloaded sash | Hinge-side dimensions and sash weight information |

Inspect the full hinge track, shoes, fasteners, and frame connection; a single close-up screw rarely identifies the correct replacement.
Inspect Symptoms Without Forcing the Sash
Begin with a visual check while the sash is supported by its normal hardware. Look for cracked frame material, pulled screws, distorted track, missing retainers, corrosion, damaged seals, and paint or debris in the hinge path. Do not lean on a wide sash or force a crank through a hard stop. If glass is cracked, the frame is loose, or the sash could fall, stop and use a qualified professional.
- Photograph the closed unit, hinge side, operator, lock, keeper, and label.
- Measure visible gaps at head, sill, and lock jamb with the sash closed.
- Operate slowly and note the angle at which resistance begins.
- Check whether the sash contacts trim, a screen, a shade, or a neighboring unit.
- Inspect seal compression after closure and record any air or water path.
Compare the symptom with the repair acceptance test, which emphasizes operation, locking, alignment, seals, and documentation. A hinge can be healthy while a loose keeper or swollen finish creates the same handle resistance.
Decide Whether Adjustment Is Enough
Adjustment is appropriate only within the manufacturer’s stated range. A track shoe may have limited lateral or height adjustment; a friction stay may have a specified screw and restrictor position. Do not enlarge holes, substitute fasteners, or bend a hinge arm to gain clearance. Those actions can weaken the frame, change sash alignment, and void a tested configuration.
Check sash weight and size against the hinge system’s limit. A replacement glass unit or added interior finish can increase load. The NFRC rating resources reinforce that performance belongs to a defined product configuration; hinge capacity is likewise tied to a defined sash and hardware set. Ask the supplier for a project-specific part and adjustment procedure.
When corrosion is present, identify the exposure and drainage cause. Cleaning and a compatible lubricant may help a serviceable assembly, but pitted tracks, cracked shoes, and elongated mounting holes are replacement signals. Preserve removed parts until the new assembly is accepted.
Specify a Matched Replacement
A useful request includes opening mark, hinge side, sash dimensions, frame material, track or hinge type, operator, lock, keeper, restrictor, screen, finish, and photographs. Include fastener spacing and stack-height measurements when visible. State whether the goal is a part-only repair, a hinge-and-operator set, a sash replacement, or a complete unit.
Ask the manufacturer to confirm compatibility in writing. A hinge that fits the track may not support the sash, provide the required opening angle, or maintain seal compression. If the unit is part of an egress opening, verify that the replacement does not reduce clear opening or interfere with emergency release. For replacement work that disturbs older coatings, consult the EPA renovation guidance and local requirements.
Run the Closeout Test
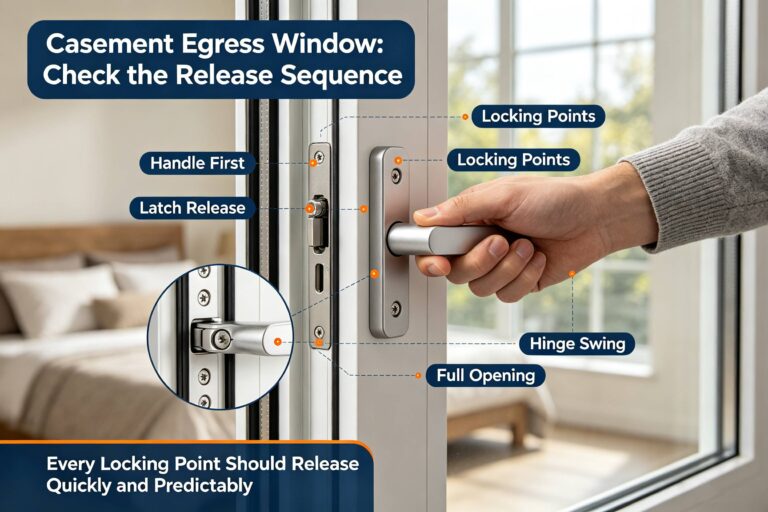
After adjustment or replacement, test from the normal room side. Open and close through the full intended range, confirm the sash remains supported, engage every lock point, and check even seal contact. Confirm the operator handle is reachable, the screen fits, and no trim or furnishing collides. Check exterior drainage paths and sealant interfaces without claiming a field test proves a laboratory rating.
- Closed position: uniform gaps, seal contact, and no visible twist.
- Partial opening: smooth travel and stable hinge shoes.
- Full intended opening: limiter and screen operate as designed.
- Locking: keeper engagement without excessive force.
- Record: photos, parts, installer, date, and any remaining limitation.
Include a simple acceptance note in the project file. State the opening mark, hinge part or adjustment used, the observed opening angle, and whether the sash stayed supported while the operator was released. Note weather conditions if a water observation was made, but distinguish a visual observation from a laboratory or field performance test. If the repair leaves a known limitation—such as a reduced opening angle for a guard—record who accepted it and what future service should check. This small note prevents a later technician from treating an adjustment stop as a defect or a temporary shim as a permanent repair.
Frequently Asked Questions
How do I know which casement window hinges I have?
Record the opening mark, hinge side, track or hinge style, shoe shape, fastener pattern, sash size, operator, and any manufacturer or part markings; photographs alone are often insufficient.
Can I lubricate a stiff hinge?
Only use the lubricant and service method approved for that hardware. First rule out misalignment, debris, loose fasteners, corrosion, or a damaged track; never force the crank.
When should a hinge be replaced instead of adjusted?
Replace when the track, shoe, arm, or mounting holes are bent, cracked, badly corroded, loose, or outside the stated adjustment range, and obtain a matched part.
Will a new hinge change egress?
It can. Hinge travel, restrictors, screens, or sash alignment may reduce clear opening, so verify the installed opening against the applicable project and code requirements.
Conclusion: Diagnose the Load Path
Casement window hinges work as part of a system. Identify the complete assembly, inspect without forcing the sash, adjust only within documented limits, and match any replacement to the opening, sash, operator, seals, and clear-opening duty. A short closeout record is what turns a plausible repair into a verifiable one.