2026-09-03
Direct answer: Check a casement window latch only after the sash reaches the closed position without being pulled by the latch. Observe the latch, keeper, sash alignment, hinge support, operator travel, and seal contact together. Adjusting the keeper first can hide the actual cause and create uneven compression.
A Casement Window Latch Works With a Keeper and Aligned Sash
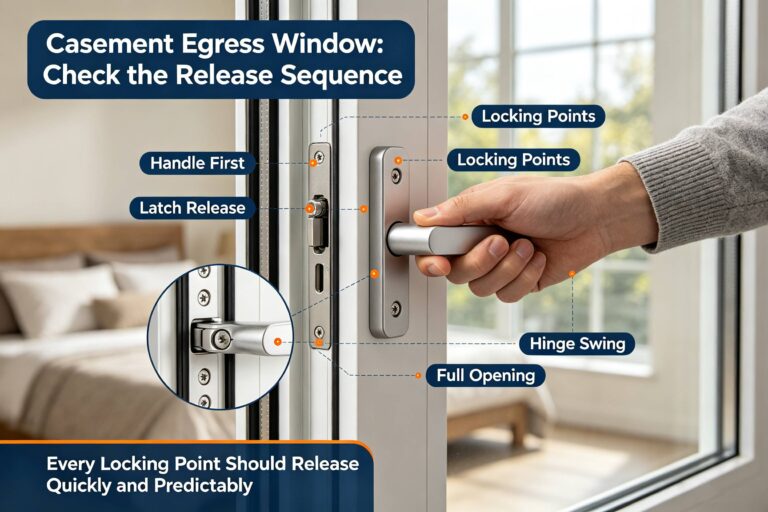
A casement window latch is the room-side locking control or lock mechanism that engages one or more keepers when the sash is closed. Product designs differ: one handle may operate a single point, multiple points, or internal linkage. The keeper is the receiving component mounted at the specified position. Neither name alone identifies a compatible replacement or an approved adjustment.
The latch completes closure after the operator brings the sash to the frame. It may draw the sash into its designed seal contact, but it is not a substitute for correct hinge support, frame alignment, operator travel, fastener support, or undamaged weatherstripping. A latch that suddenly requires unusual force is a symptom to document, not an invitation to push harder.
Forge Windows’ lock replacement guide focuses on matching a replacement part. This article addresses a different decision: whether the installed latch and keeper are meeting correctly, and whether adjustment is appropriate at all.
| Observed condition | Inspect before changing the latch | Reason |
|---|---|---|
| Sash closes smoothly but latch misses keeper | Keeper position, latch travel, loose fasteners, prior changes | The interface may be localized |
| Sash rubs before reaching the keeper | Hinges, frame square, sash support, finish buildup, debris | Latch adjustment will not remove the interference |
| Top engages but bottom does not | Reveal, sash twist, multipoint linkage, keeper sequence | Uneven engagement may signal alignment or linkage trouble |
| Latch closes but a corner seal is loose | Seal condition, sash plane, keeper location, frame distortion | Locked does not automatically mean uniformly sealed |
| Handle is loose or linkage feels disconnected | Handle attachment, internal linkage, fasteners, part identity | Forcing can worsen concealed damage |

Observe the Latch Sequence Before Adjustment
Assign the window an opening mark and state the viewing convention. Photograph the whole closed window, the open sash, each latch point, every keeper, the hinges, operator arms, seals, labels, and visible fasteners. Use removable tape or a sketch to number multiple locking points; do not mark finished surfaces permanently.
With the latch released, operate the sash slowly toward closed. Stop if glass is cracked, the sash is unstable, an arm is detached, or metal is bending. Note the first point of resistance and whether it occurs at the hinge side, head, lock side, sill, screen, trim, or operator. The sash should reach its designed pre-latch position without the latch being used as a winch.
Next observe engagement without placing fingers between sash and frame. Does the latch enter the keeper centrally? Does a roller, hook, cam, or bar follow the intended path? Do all points engage in sequence? Does the handle stop at its normal position? Compare the reveal—the visible gap between sash and frame—at several locations. A changing reveal can indicate alignment issues that a moved keeper would merely mask.
Manufacturer instructions demonstrate the need for product-specific work. Andersen’s E-Series keeper replacement guide directs the replacement keeper to the same position using retained screws for the covered unit. That procedure should not be generalized to an unknown product or used as permission to relocate hardware.
Separate Latch Engagement, Sash Alignment, and Seal Contact
Create three columns in the service record: observed symptom, test performed, and result. “Window will not lock” is not a diagnosis. Record whether the operator completed travel, whether the sash met the frame evenly, whether the keeper was secure, whether the latch moved freely while open, and whether weatherstripping was intact and seated.
Inspect support hardware because a small change at the hinge can become a large mismatch at the latch side. Look for loose screws, elongated holes, displaced hinge tracks, bent arms, corrosion, debris, and uneven sash height. Do not adjust a hinge or operator unless the product instructions define the method and the sash can be supported safely.
Inspect seals without stretching or removing them unnecessarily. Note gaps, tears, compression set, paint, dirt, or sections pulled from their kerf. A thick replacement seal can prevent closure; a missing or damaged section can leave an air path even when the latch engages. Forge Windows’ weatherstrip inspection guide organizes the seal review separately from hardware decisions.

Set Boundaries Before Moving a Keeper or Latch
Adjustment should follow the exact manufacturer service document for the identified window. Preserve original positions with photographs and measured reference marks. Use the specified tool, fastener, torque approach, and adjustment range. Change one variable at a time, then repeat the full operating sequence. If a modification requires new holes, enlarged holes, bent hardware, altered linkage, or removed safety devices, stop for written technical review.
Do not mix latch, opening-control, guard, and emergency-release functions. If the opening is part of an emergency escape and rescue route, any hardware change must preserve normal inside operation under locally adopted rules. Forge Windows’ egress release-sequence guide provides a separate record for that check.
Use caution around older painted windows. The U.S. Environmental Protection Agency’s Renovation, Repair and Painting guidance explains federal requirements for covered work that disturbs painted surfaces in many pre-1978 homes and child-occupied facilities. Local and project requirements may add duties; define the disturbance before work begins.
Escalate rather than adjust when the frame is out of square, the sash is twisted or sagging, fastener support is damaged, concealed water deterioration is visible, glass is cracked, multipoint linkage is disconnected, or the required replacement is unidentified. A successful latch movement is not a safe closeout if the underlying assembly remains unstable.
Verify the Casement Window Latch and Seal Together
After approved service, operate the window from the normal user position. Unlock, open to the intended limit, observe hinges and arms, close without pulling on the latch, then latch using normal hand effort. Repeat at least three times. Confirm that the screen, blind, counter, and trim do not interfere and that the handle reaches its intended final position.
Check the reveal and visible seal contact at the head, sill, hinge side, and latch side. A thin removable paper check may be allowed by some service procedures, but do not invent a pressure test or use a method that could damage seals. Air, water, or structural performance claims require the applicable product documentation and test method; a hand-operated field check cannot recreate a laboratory rating.
Record the original condition, product identity, latch and keeper references, measurements, adjustment made, retained or new fasteners, operating results, remaining limitations, person responsible, date, and warranty. Photograph every latch point in the final closed and open conditions. Link that record to the opening schedule so future service does not restart from guesswork.
Frequently Asked Questions
Why does my casement window latch not line up?
Possible causes include a moved keeper, loose fasteners, sash sag, hinge wear, frame distortion, operator travel, debris, finish buildup, seal interference, or damaged linkage. Observe the closing path and reveal before changing hardware.
Can I move the keeper to make the latch close?
Only when the identified manufacturer’s procedure permits that adjustment and the sash, frame, hinges, operator, and seals are otherwise correct. Preserve the original position and avoid unsupported new holes.
Should the latch pull a hard-to-close sash into place?
No. The sash should reach its designed closed position without the latch overcoming substantial binding. Forcing the handle can damage the latch, keeper, linkage, frame, or sash.
Does a closed latch prove the window is sealed?
No. Verify seal condition and contact around the full perimeter. A latch can engage while a corner remains misaligned, a seal is missing, or the frame is distorted.
Conclusion: Diagnose Alignment Before Latch Adjustment
A casement window latch should be evaluated as part of an aligned, supported, and correctly sealed window. Observe the closing path, separate keeper engagement from sash and seal faults, and change hardware only under a product-specific procedure. Send Forge Windows the opening mark, product labels, inside-view photographs, reveal measurements, latch sequence, seal observations, and any service history for a project-specific review.