2026-08-12
Direct answer: A Casement Window replacement should not be ordered from one width and height alone. A reliable handoff records the opening at several locations, verifies squareness and sill condition, identifies whether the frame stays or is removed, and documents glass, operation, egress, finish, performance, and installation responsibilities. This guide helps U.S. homeowners, contractors, and specifiers organize those inputs before requesting a project-specific proposal from Forge Windows.
Key Takeaways
- Decide whether the project is an insert replacement or a full-frame replacement before treating any dimension as final.
- Record multiple opening measurements, diagonals, depth, sill slope, interior and exterior obstructions, and finished-floor relationships.
- Identify hinge side and opening direction from the correct viewing position.
- Match energy ratings, glass, hardware, screens, finishes, and installation details to the exact quoted configuration.
- Final fabrication dimensions should be approved by the party responsible for field verification.
Why a Casement Window Needs More Than One Measurement
Existing openings are rarely perfectly square, level, or consistent from one side to the other. Trim can conceal the structural opening, and an old frame may include stops, liners, sealant, or flashing that affect usable space. Measuring only the visible glass or sash will not define the replacement unit. The measurement record must also state what remains in place after demolition.
The goal is not to force every opening into a universal deduction. Installation clearances depend on the product, substrate, anchoring plan, perimeter seal, insulation, flashing, and tolerances. Ask the selected manufacturer and installer to confirm the required allowance. Do not subtract an improvised number and present it as an approved fabrication dimension.
Step 1: Define the Replacement Scope
An insert replacement generally keeps more of the existing frame, while a full-frame replacement removes the old window to expose more of the opening. Those approaches can produce different unit sizes, sightlines, flashing access, trim work, and repair needs. Photograph the interior and exterior before demolition decisions are made. Note rot, corrosion, cracking, staining, or movement for professional evaluation.
Clarify who will remove the existing unit, repair the substrate, verify the rough opening, approve shop drawings, install the new Casement Window, and complete interior and exterior finishes. If those responsibilities are split among trades, use one shared dimension sheet. Conflicting assumptions are easier to correct on paper than after fabrication.
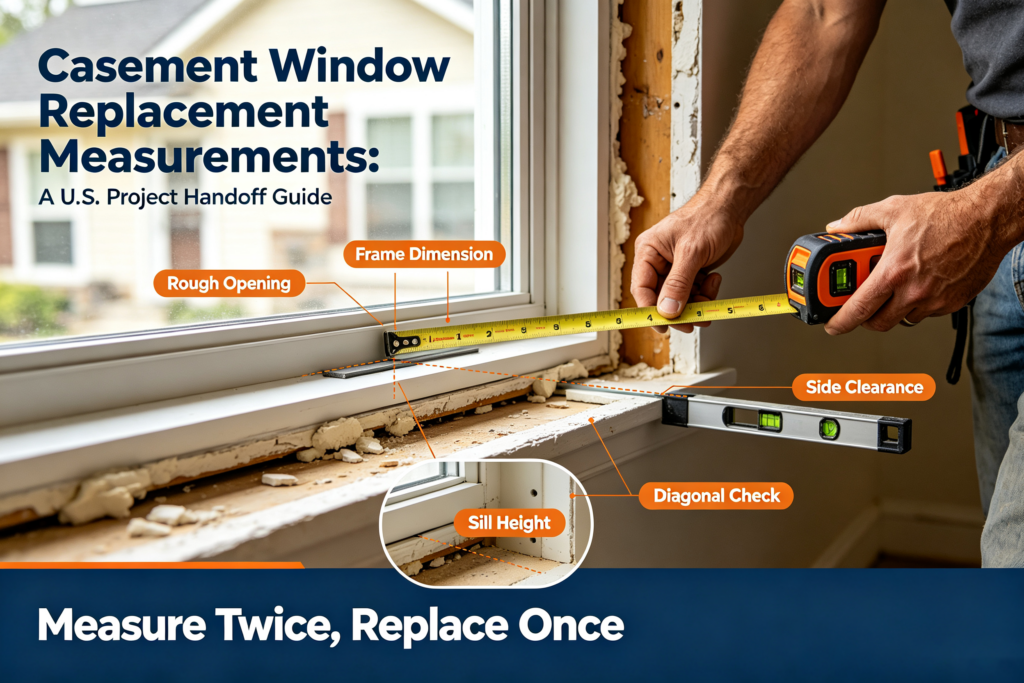
Step 2: Build a Casement Window Field-Measurement Sheet
| Field item | What to record | Why it matters |
|---|---|---|
| Width | Top, middle, and bottom opening dimensions | Reveals taper or obstruction |
| Height | Left, center, and right dimensions | Reveals an uneven head or sill |
| Diagonals | Corner-to-corner dimensions | Supports a squareness check |
| Depth | Available frame and finishing depth | Affects placement and trim coordination |
| Sill and drainage | Slope, condition, exterior exposure | Supports water-management detailing |
| Obstructions | Shades, handles, cabinets, guards, screens | Protects operating clearance |
Use a consistent unit of measure and label every value clearly. Add a sketch showing the room side, exterior side, top, sill, left jamb, and right jamb. Include a scale reference in photographs when useful. Field notes should be readable by someone who did not attend the survey.
Step 3: Confirm Handing and Operating Clearance
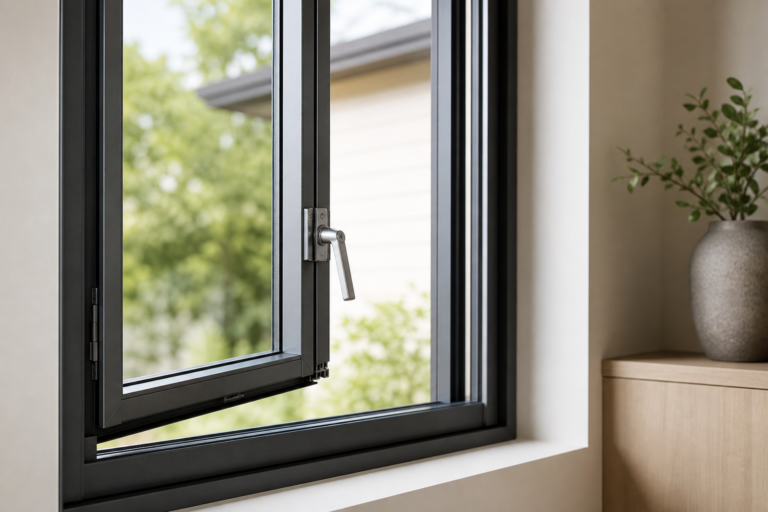
Casement handing can be described differently unless the viewing position is stated. Mark whether the sketch is viewed from indoors or outdoors, identify the hinge jamb, and draw the sash swing. Confirm that the operator and handle clear blinds, countertops, backsplash, furniture, and interior trim. Outside, check screens, walkways, rooflines, plants, guards, and adjacent openings.
Do not assume an outward-opening sash is suitable in every location. The designer and local authority should review applicable requirements, including emergency escape and rescue provisions when relevant. This article does not assign code compliance from a photograph or product name. Provide the project location and occupancy to the responsible professional.
Step 4: Translate the Survey Into a Product Specification
Measurements establish fit, but they do not select glass, frame, hardware, or performance. Create a schedule that pairs each opening mark with unit size, configuration, hinge side, glass description, finish, screen, hardware, and required documentation. Review the Z75X Thermal Break Casement Window and 65 Series 1.4 mm Thermal Break Casement Window as examples to discuss with Forge Windows. Do not assume that every option shown or requested is available for every size.
The National Fenestration Rating Council explains whole-product ratings for windows, doors, and skylights in its residential guidance (accessed August 12, 2026). Confirm that any U-factor, solar heat gain coefficient, visible transmittance, or air-leakage value applies to the exact proposed configuration. A frame description or glass center-of-pane value is not a substitute for applicable whole-product documentation.
Step 5: Check Current Energy Criteria
ENERGY STAR publishes current key product criteria for residential windows, doors, and skylights (accessed August 12, 2026). Requirements vary by product and climate context, and criteria may change. Verify the current version and the exact certified configuration at the time of selection. Do not write “ENERGY STAR” into a schedule unless supporting documentation is available.
The NFRC Certified Products Directory (accessed August 12, 2026) can help teams research listed configurations. Match manufacturer, series, operator type, glass, size qualifications, and other identifiers carefully. Save the applicable record with the approved submittal rather than relying on a search screenshot without context.
Step 6: Review Installation Interfaces Before Approval
A replacement drawing should show frame placement relative to the wall, sill, weather-resistive barrier, flashing, drainage plane, insulation, perimeter sealant, backer material, trim, and finishes. It should also identify attachment locations and substrate assumptions. The window supplier, installer, architect, and building-envelope professional may each provide different parts of this information. Assemble them into one coordinated detail.
Ask how field variations will be handled and who can authorize changes. Define acceptable opening conditions before delivery. If damage appears after removal, stop and document it rather than modifying the new window without approval. Keep photographs of concealed conditions and completed flashing with the project file.
Pre-Order Checklist
- Replacement method and demolition limits are approved.
- Width, height, diagonals, depth, sill, and obstructions are documented.
- Handing and viewing position are unambiguous.
- Glass, finish, screen, hardware, and opening schedule are coordinated.
- Applicable ratings and certification records match the quoted configuration.
- Installation, flashing, sealant, trim, and repair responsibilities are assigned.
- The responsible party has signed off on fabrication dimensions.
For a wider product-selection framework, review Forge Windows’ Casement Window specifications guide. Then use the Forge Windows contact page to send the opening schedule, drawings, photographs, location, and required documentation. A complete inquiry supports a more useful technical response.
Frequently Asked Questions
Should I measure the glass to order a replacement?
No. Glass dimensions do not define the frame, installation clearance, or opening condition. Measure the approved opening boundaries and state which existing components remain.
Can I use the smallest width and height?
Those values are useful observations, but they are not automatically fabrication dimensions. The manufacturer and installer must apply product-specific clearances and tolerances.
Who should verify final Casement Window dimensions?
The contract should name the responsible party, commonly the installer, dealer, contractor, or qualified surveyor. That person should verify field conditions and approve the order record.
Do NFRC ratings determine window size?
No. NFRC ratings describe energy-performance characteristics for documented configurations. Fit, structural design, code requirements, and installation details require separate review.
What should I send Forge Windows?
Send dimensioned sketches, photographs, opening marks, project location, wall and sill conditions, desired operation, glass and finish goals, performance requirements, and the responsible verifier’s contact information.
Conclusion: Turn Casement Window Measurements Into an Approved Handoff
A Casement Window replacement succeeds when field conditions, product configuration, ratings, and installation interfaces are documented together. Measure systematically, identify the replacement method, remove handing ambiguity, and assign responsibility for final verification. Forge Windows can review available configurations once the project team provides accurate information and clearly stated requirements. Submit the completed survey package before approving fabrication.