2026-09-03
Direct answer: Identify a casement window operator from the exact window and complete mechanism, not the crank handle alone. Record the product series, manufacturing period, handing convention, arm pattern, arm length, mounting holes, sash connection, travel, cover, and stamped markings before ordering a replacement.
A Casement Window Operator Is More Than the Crank
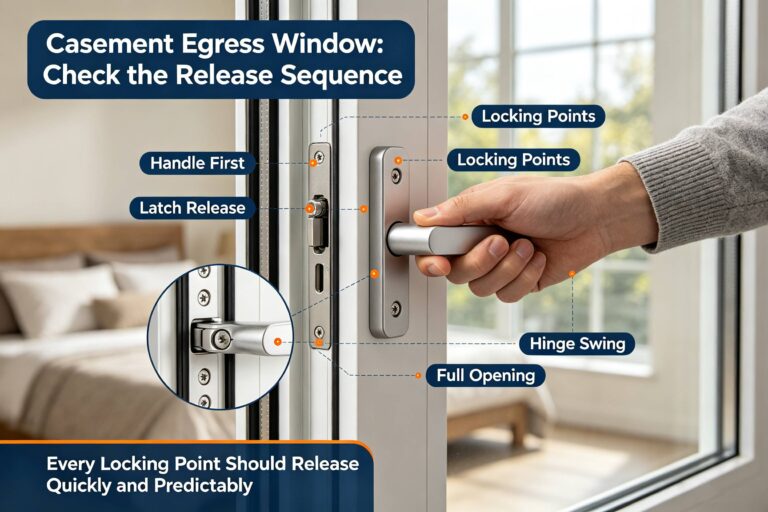
A casement window operator is the geared or linked mechanism that moves a side-hinged sash when the user turns a handle or uses another approved control. Its base is mounted to the frame or sill area, and one or more arms connect to a sash bracket, channel, or related hardware. The crank handle and cover are service parts around the operator, while the hinges support and guide the sash and the latch secures it closed.
This definition matters because a loose handle, damaged operator, bent arm, worn hinge, displaced sash bracket, and misaligned lock can all produce “the window will not open” complaints. Forge Windows’ parts and symptom guide helps separate these zones. This article goes further into operator identification for an actual replacement order.
Andersen’s current A-Series and 400 Series operator guidance distinguishes straight-arm and split-arm configurations and first directs the reader to identify the window series. The associated operator replacement guide lists multiple operator forms and procedures. These documents are examples for covered Andersen products, not universal instructions.
| Identification field | Evidence to capture | Ordering risk if omitted |
|---|---|---|
| Window identity | Series, label, order record, approximate date, opening mark | Correct-looking part may belong to another generation |
| Handing | View side, hinge side, operator side, manufacturer convention | Mirrored arm or base may not connect |
| Arm pattern | Straight, split, dual, scissor, channel, bracket, clips | Travel and attachment may be incompatible |
| Geometry | Pivot centers, arm length, mounting centers, offsets | Sash may stop early or overtravel |
| Interface | Handle drive, cover, sash bracket, channel, fasteners | Operator may not fit the installed assembly |
| Condition | Gear slip, play, corrosion, bending, loose support | Another failed component may be left in service |

Create a Casement Window Operator Identification Record
Begin without disassembly. Give the opening a unique mark and photograph the complete window from indoors, the exterior when safely accessible, product labels, hinge side, lock side, handle, cover, operator base, arms, sash bracket or channel, and fasteners. Include one image of the sash partly open and one at the normal open limit. Keep people and tools clear of pinch points.
Record the manufacturer and exact series when known, plus label codes, visible glass dimensions, frame material, sash arrangement, approximate manufacturing date, and prior service parts. Older product families may use different operators within a visually similar frame. A neighboring window is supporting evidence only if its identity, size, handing, and hardware generation actually match.
Document all stamped or cast numbers exactly, including spaces, dashes, logos, and the surface on which they appear. Photograph markings straight on with a ruler in the same plane. Do not clean with aggressive solvents, grind corrosion, or remove coatings just to expose a number. If identity remains uncertain, send the complete record to the original manufacturer or qualified supplier rather than selecting by one dimension.
Document Arm Geometry, Travel, and Handing
State the viewing convention first: “viewed from indoors” or the exact manufacturer convention. Then record the hinge side, handle location, operator base orientation, arm connection, and opening direction. “Left operator” without a stated convention is ambiguous.
Sketch the operator with labeled pivot centers. Measure arm length by the method required by the identified manufacturer; endpoints can differ between documents. Record mounting-hole centers, base footprint, offset from the frame reference, bracket position, channel length, clip style, and the location of stops or limit devices. A casual overall-arm measurement may not match the dimension used in a parts catalog.
Operate the existing mechanism only if the sash and hardware are stable. Note the angle or position where the arm changes direction, where resistance begins, whether the operator reaches its intended limits, and whether the sash closes evenly before latching. Do not force the gears at either end. Forge Windows’ casement hardware schedule connects the operator to hinges, locks, controls, screens, finishes, and opening marks so the replacement is reviewed as a system.

Plan Safe, Product-Specific Operator Replacement
Confirm the replacement part in writing: manufacturer reference, supersession if any, window series and date range, handing, arm form and length, mounting pattern, finish, handle and cover requirements, included clips or brackets, instructions, and warranty. If a discontinued operator requires a new channel, bracket, stop, sill trim, or sash modification, that broader conversion must be reviewed before work.
Operator replacement can release control of the sash. The Andersen service guide cited above warns that the sash must remain supported during covered replacement procedures and describes risks around heavy units, tools, and elevated openings. Apply the safety instructions for the actual product and project; do not copy a sequence from a different unit.
Stop and use a qualified service professional when the sash is heavy or unstable, exterior access is unsafe, glass is cracked, the connection cannot be identified, fastener support is damaged, concealed water deterioration is present, or a safety or emergency-release device is involved. If work may disturb older paint, consult the U.S. Environmental Protection Agency’s Renovation, Repair and Painting program and applicable project requirements before starting.
Preserve old parts until final acceptance. Photograph every connection before removal, contain loose components, and use only the specified fasteners and attachment locations. Improvised holes, bent arms, mixed clips, and unapproved lubricants can change travel, support, durability, or warranty conditions.
Commission the Operator as Part of the Complete Window
After approved installation, remove temporary supports only as directed. From the normal user position, unlock the sash, deploy the handle, open through the intended travel, observe arms and hinges, close without forcing, and latch. Repeat at least three times with the screen and window treatment in place. Listen for gear skip and contact; watch for arm flex, loose mounting, cover movement, sash drop, and changing reveal.
Confirm that the operator stops at the intended positions, the sash clears exterior obstructions, the handle and cover clear interior finishes, and the latch engages without using excess force. Check that opening controls, guards, screens, and any required emergency-release function remain as approved. An operator replacement does not itself prove air, water, structural, thermal, or code performance.
The closeout file should preserve the opening mark, product label, original and replacement operator references, handing convention, measurements, photographs, instructions, installer, completion date, operating results, exceptions, maintenance directions, and warranty. This evidence makes future service reproducible and prevents a compatible part from becoming an undocumented one-off.
Frequently Asked Questions
How do I identify a casement window operator?
Start with the exact window series and manufacturing period, then record handing, arm pattern, arm and pivot dimensions, mounting holes, sash connection, cover, handle drive, markings, and full-travel photographs.
Are straight-arm and split-arm operators interchangeable?
Not by name alone. They can differ in geometry, mounting, travel, sash connection, handing, and product generation. Use the identified manufacturer’s compatibility record and service procedure.
Can I replace an operator without removing the sash?
Some product-specific procedures may allow operator service while the sash remains installed, but the sash may need continuous support. Follow the exact instructions for the identified window and stop if the assembly is unstable.
Does a new operator fix a window that will not lock?
Not necessarily. The problem may involve sash alignment, hinges, seals, latch linkage, keepers, frame distortion, or obstructions. Diagnose the closing sequence before assigning the operator as the cause.
Conclusion: Order From a Complete Operator Record
A casement window operator cannot be identified reliably from its crank or one arm photo. Connect the mechanism to the exact window, document handing and geometry, follow the product-specific safety procedure, and commission the complete sash-and-hardware system. Send Forge Windows the opening mark, labels, inside-view convention, arm and mounting measurements, travel photos, symptoms, and service history for a project-specific compatibility review.